# assuming you have an SSH key setup. else, use the HTTPS link.git clone git@github.com:IRIS-Digital-Dosimeter/IRIS-Obsidian-Vault.git# create a personal branch. your PRs will be made off this branch, so name it something recognizable (please).git checkout -b NAME# add your notes now, if you'd like. # push your local branch.git push --set-upstream origin NAME
Download and install GitHub Desktop, a simple Git GUI that streamlines the process of creating, sharing, and integrating your edits. Once finished, launch the app.
Getting GHD Set Up
Click Sign in to Github.com.
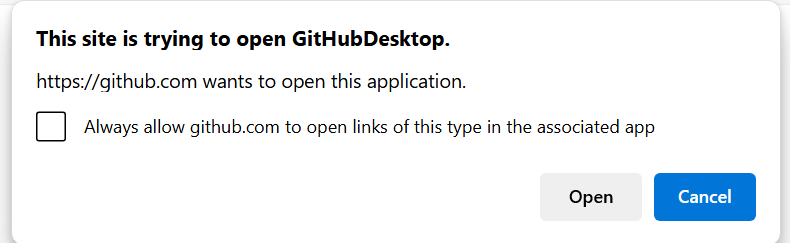
Click Continue. Sign in first if needed. If prompted with a pop-up like the following, click Open:
Ensure your details on the next page of GitHub Desktop are correct. Click Finish.
Getting a Copy of the Current Notes
Click Clone a repository from the Internet, and search for “IRIS-Digital-Dosimeter/IRIS-Obsidian-Vault”.
If you don’t see this repository, make sure you are in our organization
Click Clone once selected. This will download the existing notes to your device.
3. Creating a Personal Branch
This branch will act as your personal staging ground and digital backup for your proposed notes. Make commits to this branch as you write notes. This will ensure you have a backup to rely on. Eventually, when you think they are at a publishable stage, you can open a Pull Request which, once approved, will sync your changes to the website.
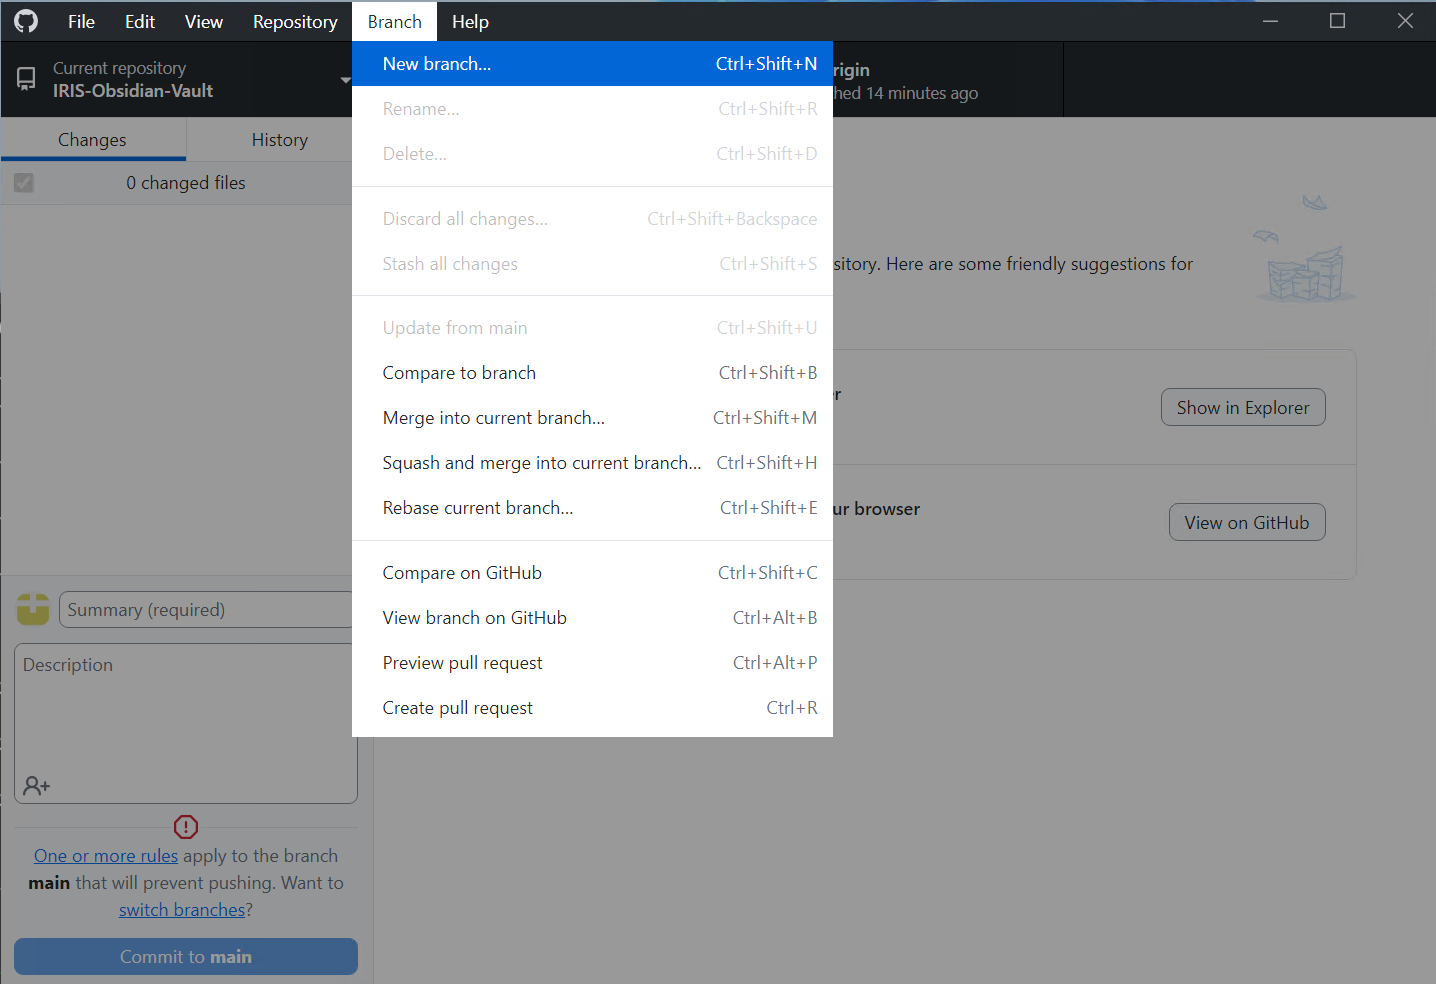
In the top bar, click Branch → New Branch
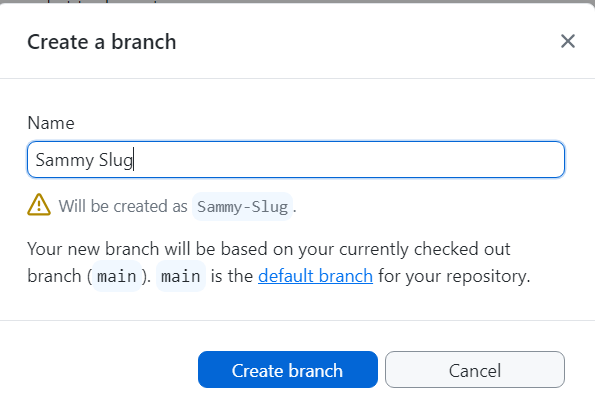
Name your branch something attributable to you - username, name, or CruzID is a good example. This will create a local branch on your computer.
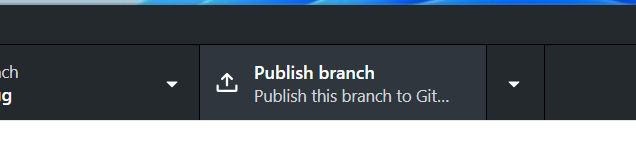
Publish your branch using the button at the top. This will upload your new, empty branch to our GitHub repository for everyone to see. Don’t worry - nothing you’ve done will affect the website just yet.
4. Obsidian (Recommended)
Download and install Obsidian MD, a very powerful and customizable markdown editor that plays nice with Quartz. For the most part, the preview you see in Obsidian is what you will see on the website.
Additionally, familiarizing yourself with keybinds for frequently used features will help productivity tremendously.
Alternatively, you could use any text editor you’d like (even in-place editing via GitHub), though this is only recommended for simple/small edits.
Once launched, Obsidian will greet you with a simple window. Click Open next to “Open folder as vault”.
Navigate to your cloned repository - by default this should be ~/Documents/GitHub/IRIS-Obsidian-Vault. Select this folder. If everything has been done correctly, you should see the following:
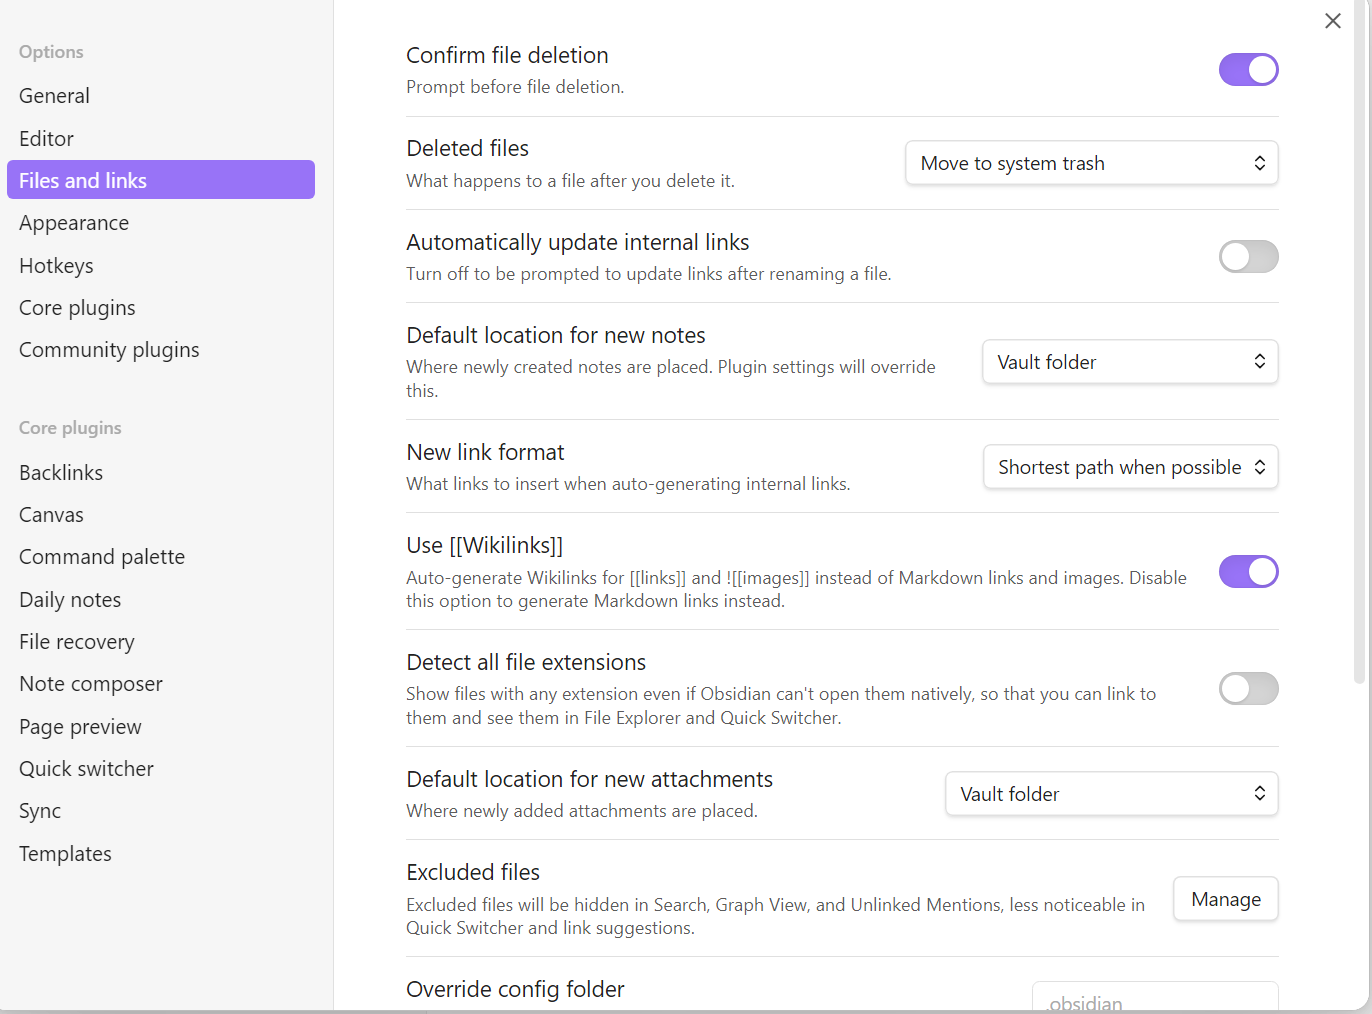
Now that your Obsidian has successfully connected to your vault, Obsidian must be configured to look for attachments in the ./External Attachments/ folder. Open the settings menu using the cogwheel in the bottom left.
Navigate to the Files and Links tab:
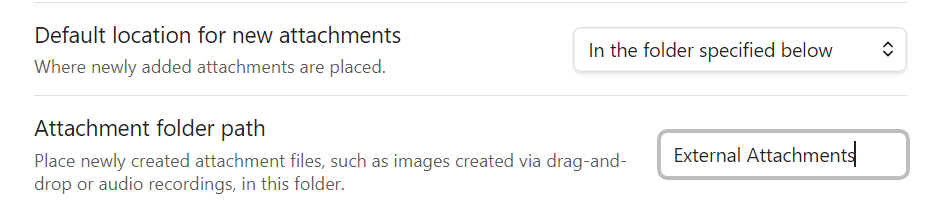
Edit Default location for new attachments from Vault folder to In the folder specified below. A new option will be shown directly underneath - edit the textbox to point to the External Attachments folder:
Adding Notes
Now, you’re ready to contribute your notes to the repository! Adding content comes in two stages:
1. Uploading Content
What is this?
This is simply the act of periodically saving your work to the GitHub repository. Not only does this let others see what is currently being worked on, but it provides snapshots through time which can be referred back to at any time. In the case of data loss on a personal device, all content committed to GitHub can be recovered easily.
Keeping Up to Date
It is vitally important to constantly keep your branch up to date with main as you work! Attempt to merge the main branch into your branch frequently via GitHub Desktop at Branch → Update from main. Fix any conflicts that may arise.
This ensures that you aren’t trying to work on notes that other people have already updated. Failing to keep your branch up to date with main will restrict your ability to merge your branch into main.
Guide
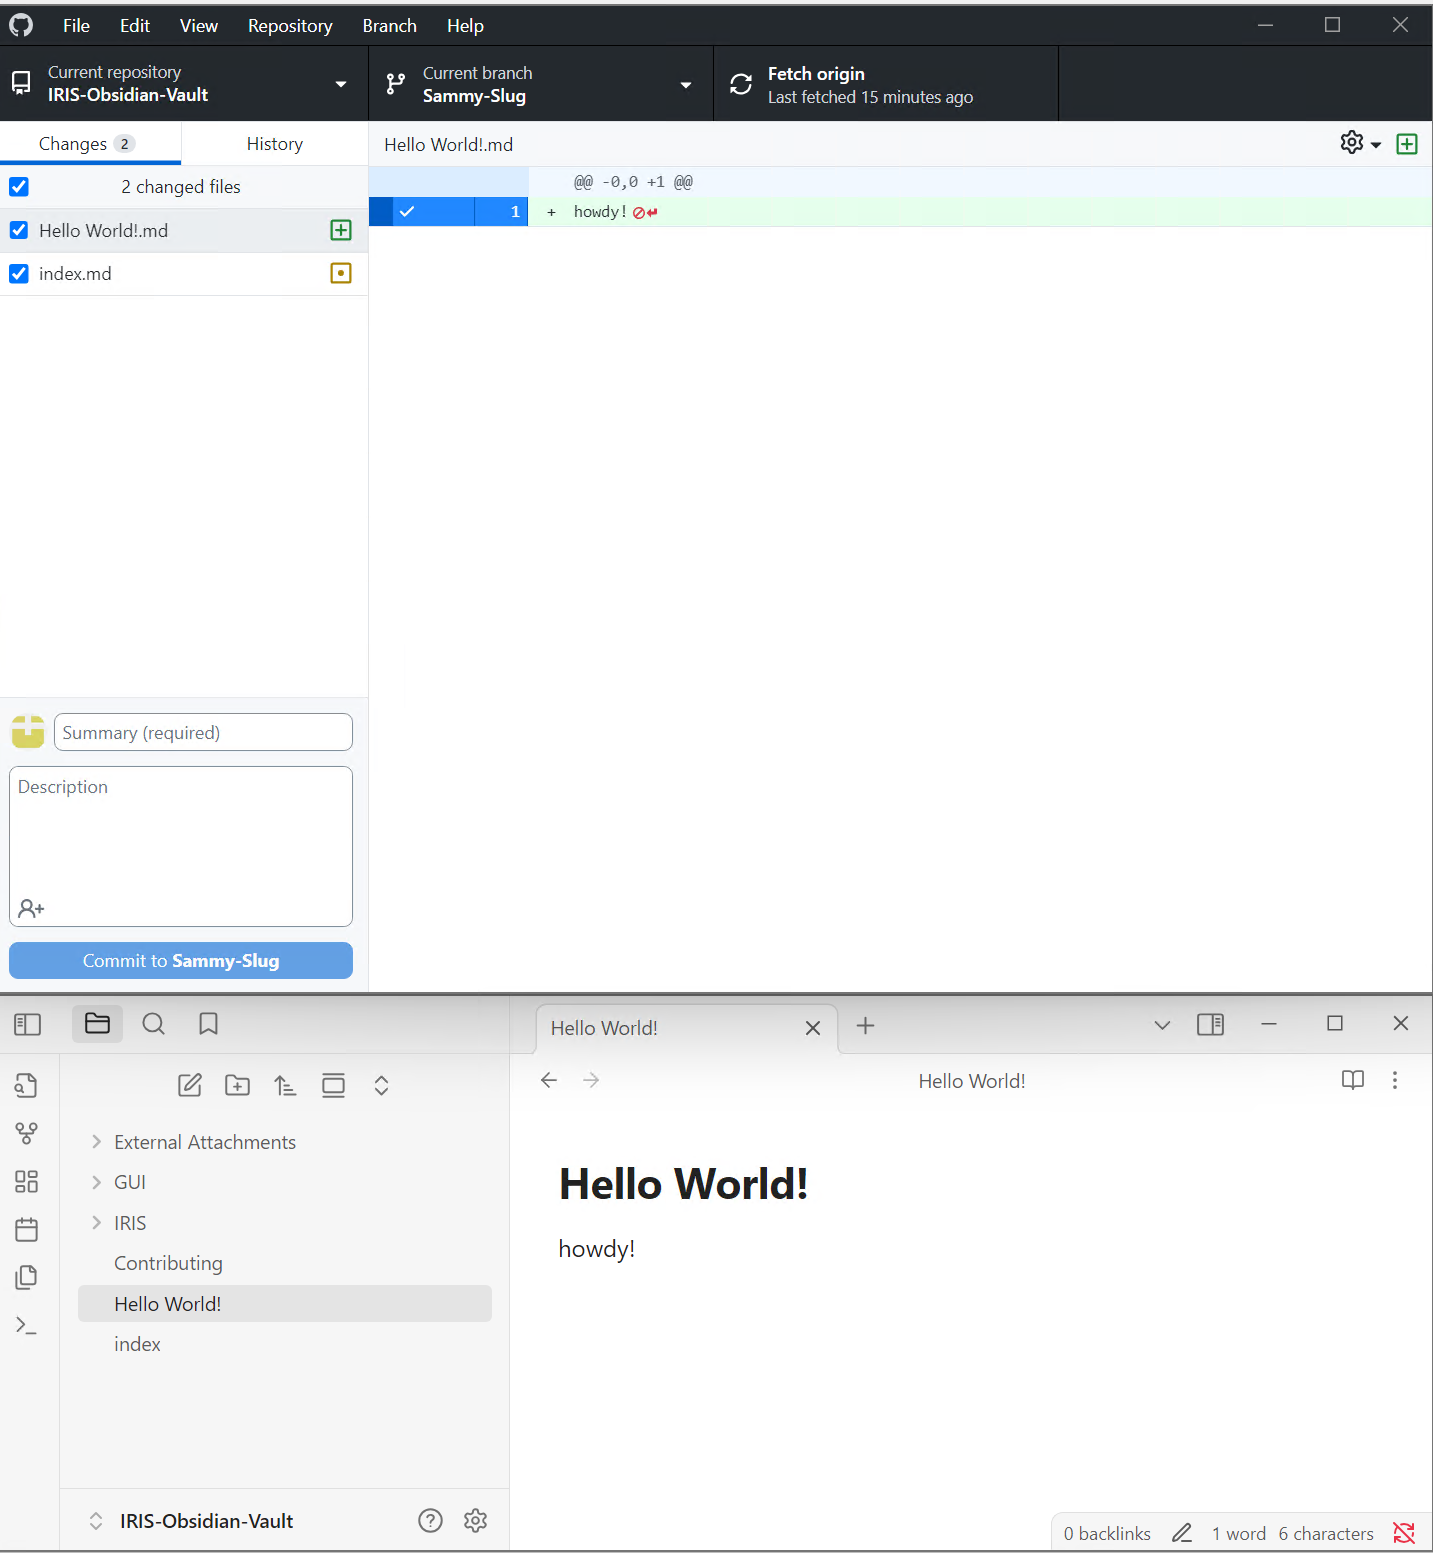
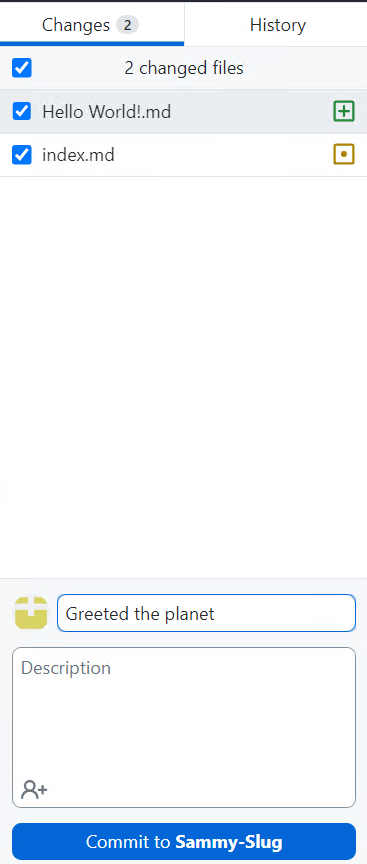
When you update the notes repository locally, you will see these changes reflected in GitHub Desktop. Below is an example of a newly created file Hello World!.md being shown in GitHub Desktop.
NOTE
Above, you see that index.md contains changes. However, closer inspection will reveal no content changes - only whitespace changes. You will likely run into similar occurences - this is fine! Either right click and discard changes, or simply leave it be. As long as no unwanted content changes exist, there’s no harm in committing such files.
To save this to the repository, first ensure that the desired files are selected in the left column of GitHub Desktop.
Next, provide a meaningful summary for your commit message - this will be the title for your chunk of progress. You may provide additional details in the Description box directly underneath. You may add coauthors as you wish.
Next, commit your changes to your branch with the blue button below. Ensure the button displays your own branch. Committing encapsulates your changes into a package that git recognizes as a unit of progress. You may make multiple commits in order to take incremental snapshots of your work, but note that they are not safely in the cloud yet.
Below is an example following the previous image:
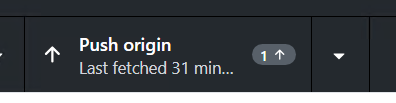
Once committed, the top bar will update with a Push origin button with an indicator on the number of commits you are about to upload to GitHub. Click this button when you want to upload your changes. These changes will be viewable by anyone via GitHub, but not the website.
Once you are ready to update the website with your recent work, you will open a Pull Request. What this will do is request two repository administrators to approve the merge of your branch into the main branch. Once approved, your changes will update the main branch of the repository, which will in turn trigger an update to rebuild the website.
Guide
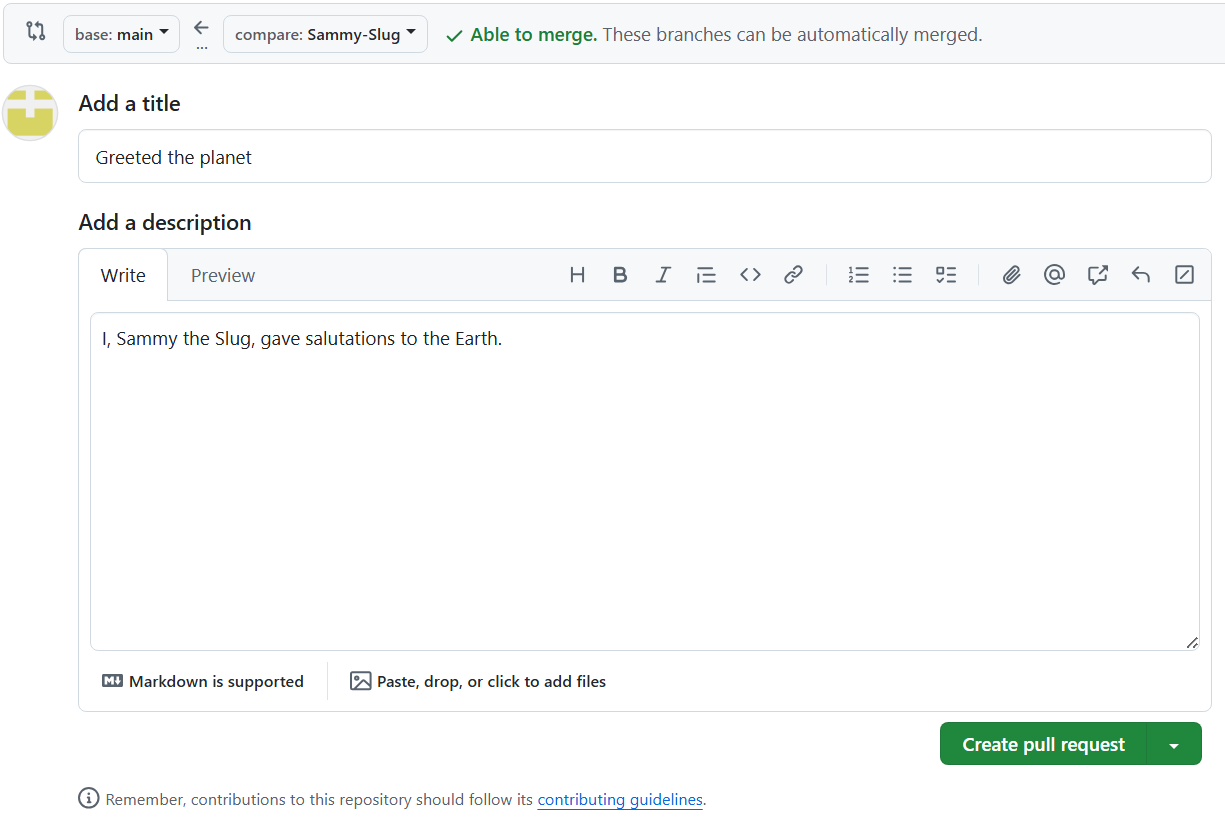
In the top bar, clickBranch → Create Pull Request. This will open up the GitHub website with a pre-filled pull request. Ensure that the top of the pull request shows your branch being merged into the main branch:
Fill out the Pull Request form with the desired details, and click the green button:
There is a check failing!
In our case, the only way this can happen is if your branch is out of date with main. Merge main into your branch frequently via GitHub Desktop at Branch → Update from main. Fix any conflicts, commit and push these changes, and your pull request should update accordingly
That’s it! (on your end)
Now, once administrators approve this change, your changes will propogate to the website. Congrats!
Issues on the website?
If you see any issues on the website with your content, contact one of the organization administrators: